Hello again, my friends! So sorry I missed you last week, but I'm back again to bring you an extra special craft for this time of year. This week's project doesn't center around a particular holiday, but it's the cutest little winter animal I've ever seen. So let's get started with our wondrous . . . Paper Penguin!
Supplies: 2 paper plates, scissors, glue, googly eyes, orange and black markers or paint.
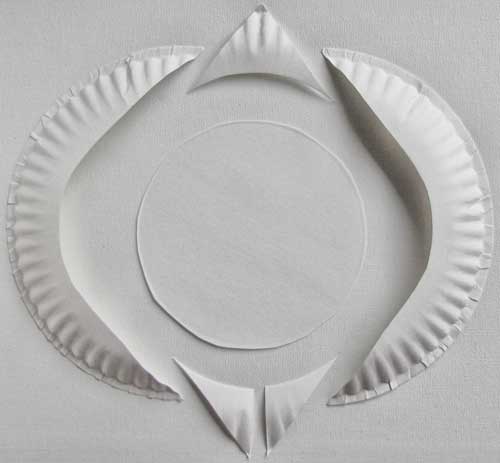
Get your supplies together and lay them out on a flat, easy-to-clean workspace. The very first step is to carefully cut one paper plate as shown:

You should use the entire plate to end up with one round head shape, 2 curved wings shapes, one large triangle and 2 smaller triangles.
Next, you'll want to lay down some newspapers, because this could get messy. Use a thick paint such as Tempera to paint the three triangles orange. You'll also want to paint the 2 outer wing shapes black, along with a small v-shaped "hairline" onto the round part of the head.
Note: You may also use markers for this step if you don't have paint.

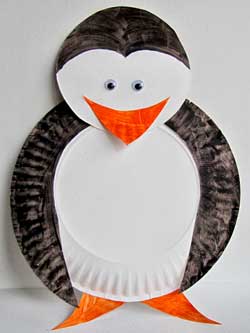
After all of your paper plate shapes have dried, assemble and glue them together as shown, using the second paper plate as a base. Glue the googly eyes to the center of the penguin's face to have an adorable arctic creature. The finished product should look similar to the picture above.
You should also have fun with this craft. Try experimenting with smaller paper plates to make baby penguins, or large paper plates to make door hangers. You could even make a punky penguin by using neon colors and glitter or feathers.
I hope you will try this craft for yourself. You're never too old to have a little fun with the glue stick! Check back again next week for another holly jolly holiday craft.