Hello, my wondrous readers, and welcome to "Nailed It!". Now before we go a step further, let me just assure you that I know what you're thinking. "That xoxkitkat simply brews an aura of macho toughness. Surely this must be a series where I can break out the ol' toolbox and learn to build myself something manly, out of grease and the bones of my enemies. Like another toolbox! Only manlier." Well let me just-- oh. No one was thinking that? Right. Let's get on with the nail art tutorial. . .
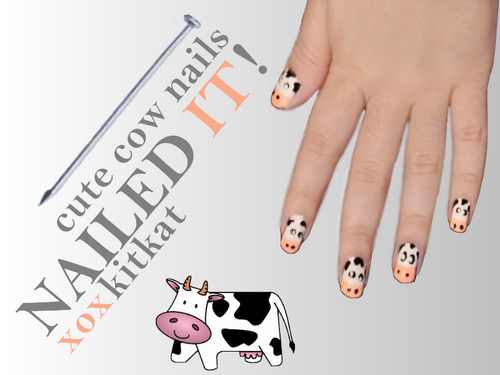
I'm writing to you today coming off one of the most revered holidays of our great nation -- National Milk Day. That joyous January 11th, though I'm sure you knew the date already, certainly did not go uncelebrated by me and mine. As an aside to drinking a nice tall glass of milk, I decided to paint my nails as a tribute to the foundation, the providers, the very ones we have to thank for this fine holiday, the cows. If you want to get the look, and I know you do, simply follow along with my quick and easy 5 step process!
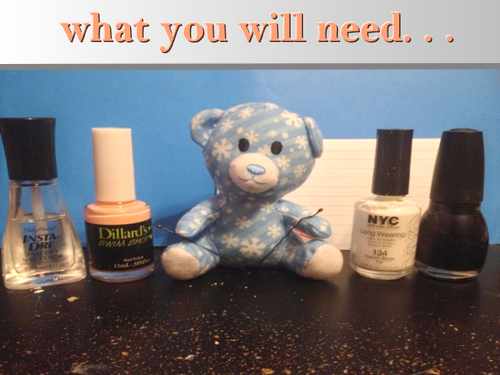
Before you get started, you'll be needing a few household essentials, including a scrap piece of paper (like an index card) and a dotting tool or stretched open bobby pin to draw your designs with. As for the actual nail polish, you'll want a base coat, top coat, and black, white, and a very pale, ballet slipper pink polish. Try to get as light of a pink as you can; too dark of a shade can have your cows looking flushed!
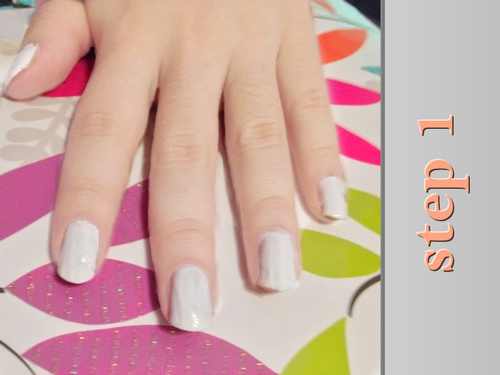
Begin by brushing on a base coat or clear polish to protect your nails from staining. Once that has dried, start off the design by painting your nails a solid white.
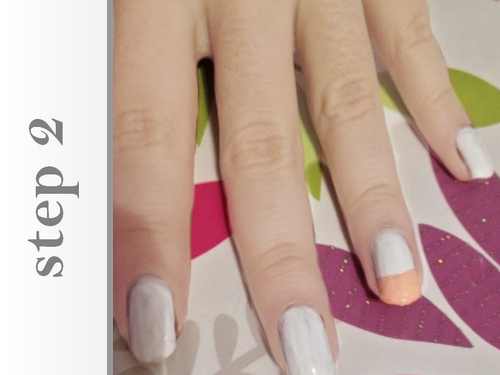
Wait for your nails to dry, and continue by painting over the bottom one third on each finger with the pink polish for your cow's nose.
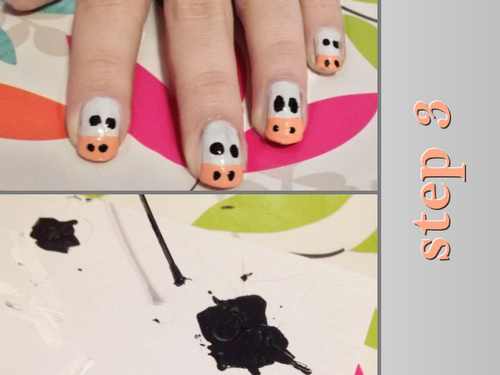
Next, brush a small glob of black onto an index card and stretch open your bobby pin. Dip one end into the polish and firmly press 2 small dots onto the pink stripe for the cow's nostrils and 2 large dots on the white for its eyes. Be sure to regularly replenish the nail polish on your index card and don't pour out too much at once. If you try to make the dots as the polish is already drying, it will come out stringy and ruin your design.
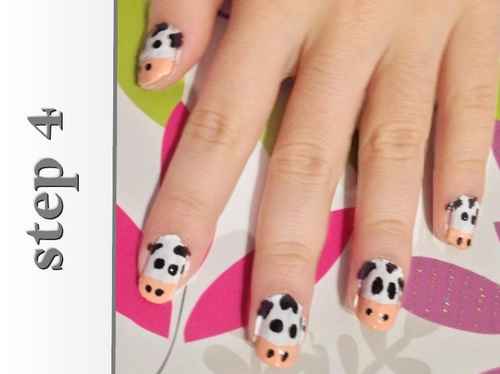
Continuing with your black nail polish and bobby pin, begin to make the cows spots. Don't stress about making them perfect, as here you can have a little more freedom with the shape without messing up the design. Personally, I found that making a series of 2 to 3 overlapping dots for each black spot was a pretty easy way for me to form the shape that I wanted. Using this method, I made 3 splotches on each nail around upper half of the cows face.
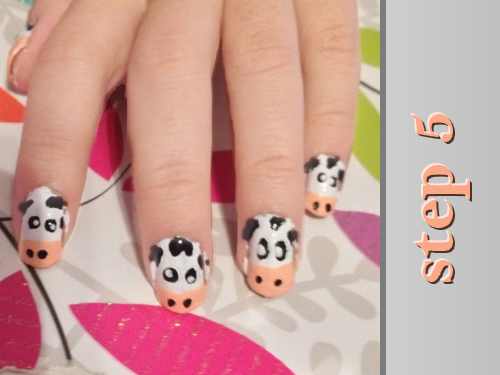
Once you've finished the cow's spots, brush a glob of white nail polish onto the index card. Using the clean end of your bobby pin, dip it into the polish and make 2 small dots on the inside of your cows' eyes. You can make them silly, facing in every different direction, or keep them uniform and all facing the same way. If you find that you didn't make your first 2 dots big enough, you can fill in the white using a toothpick instead of a bobby pin to get the same effect.
Once they're dry, brush a top coat or clear polish over each nail to protect your design, and there you have it! Cute cow nails to make up for your guilt over missing National Milk Day because, let's be honest, we all know you didn't celebrate.